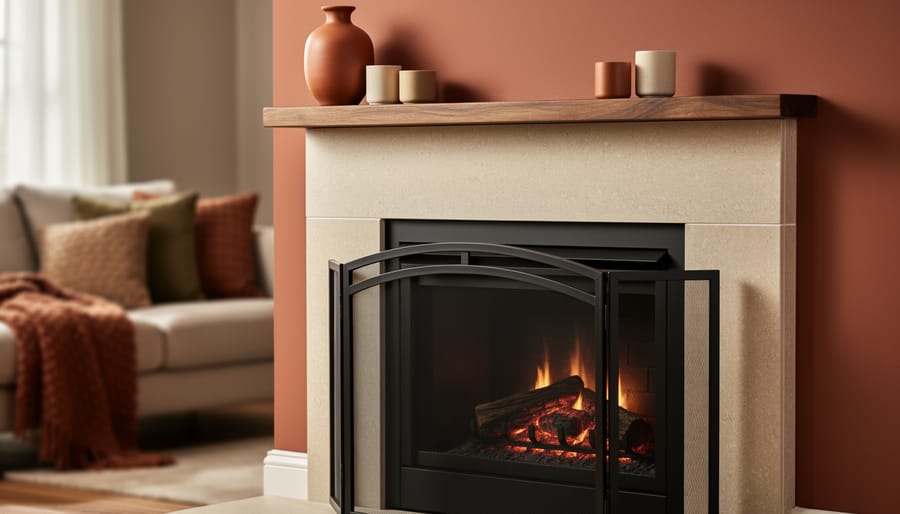
You can transform your fireplace into a stunning seasonal focal point for under $100 with simple updates like paint, new accessories, and creative styling tricks that take a weekend or less. If your hearth is showing its age or simply feels stuck in another decade, this company specializes in major renovations, but these budget-friendly refreshes deliver the visual impact without the hefty price tag or the need to call professionals for major work.
I learned this firsthand last autumn when my dated brass fireplace screen was dragging down my entire living room. A coat of matte black spray paint and a few thrifted mantel finds later, the space felt brand new. The best part? I spent less than what a single decorative pillow would have cost at a big-box store.
The secret to a successful fireplace makeover lies in choosing projects that match your skill level and deliver maximum drama for minimum dollars. Whether your hearth needs a cosmetic touch-up or a complete style shift, these eight thrifty ideas will help you create a cozy, beautiful gathering spot that looks custom and intentional this season.
How I Chose These Budget-Friendly Ideas
I’ve spent years testing fireplace makeovers, and I know firsthand how quickly costs can spiral. That’s why every idea I’m sharing here passes three strict tests: it costs under $100, you can finish it in a weekend or less, and it delivers serious visual impact without requiring a toolbox full of specialized equipment. These aren’t trendy Instagram experiments that look good in photos but fail in real life. They’re approaches I’ve used myself or heard about from readers who transformed their fireplace areas on tight budgets and timelines.
When you plan your DIY project you want confidence it’ll actually work. I’ve vetoed plenty of fireplace ideas that sounded charming but required expensive supplies, advanced skills, or weeks of evenings. What made the final cut? Projects where the before-and-after difference genuinely surprised me, and where the process felt manageable even after a long workday. If something needed three trips to specialty stores or left me frustrated, it didn’t make this list.
1. Paint the Brick or Stone Surround
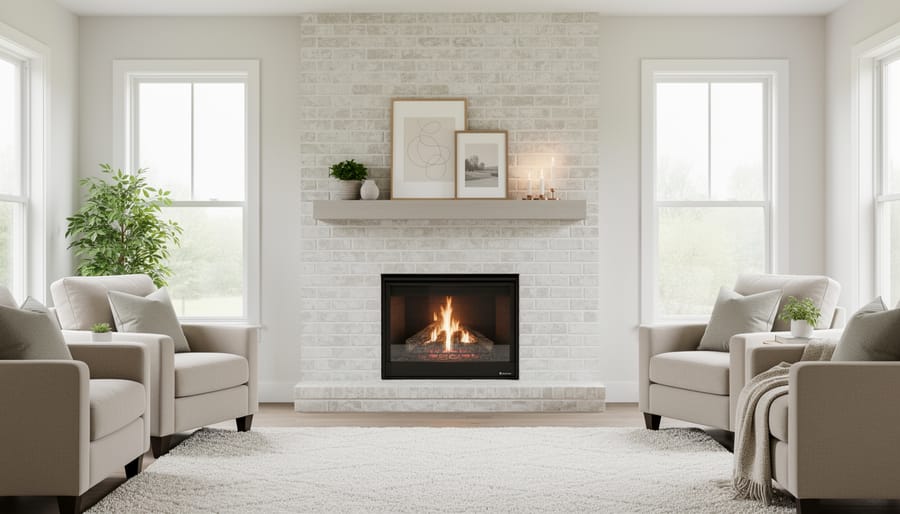
I still remember staring at our dated orange-red brick fireplace, wondering if paint would really make a difference. The answer? Absolutely. A fresh coat of paint turned that 1970s eyesore into a stunning focal point in one weekend.
Painting brick or stone is one of the most dramatic transformations you can make for under $50. White creates a clean, modern look that brightens the whole room. Charcoal adds sophisticated contrast. Even a soft gray or warm cream can work wonders. The key is to choose the right paint color that complements your existing decor.
Start by cleaning the surface thoroughly with a wire brush and TSP solution to remove soot and grime. Let it dry completely. Apply a masonry primer first, it helps the paint adhere and prevents staining from bleeding through. Then use a high-quality latex or chalk paint designed for porous surfaces. A thick nap roller works best, but keep a small brush handy for mortar lines.
Don’t worry about perfection. Brick has texture, and a slightly uneven finish adds character. Two coats usually do the trick. The transformation happens fast, and you’ll wonder why you waited so long.
2. Swap Out the Mantel Decor
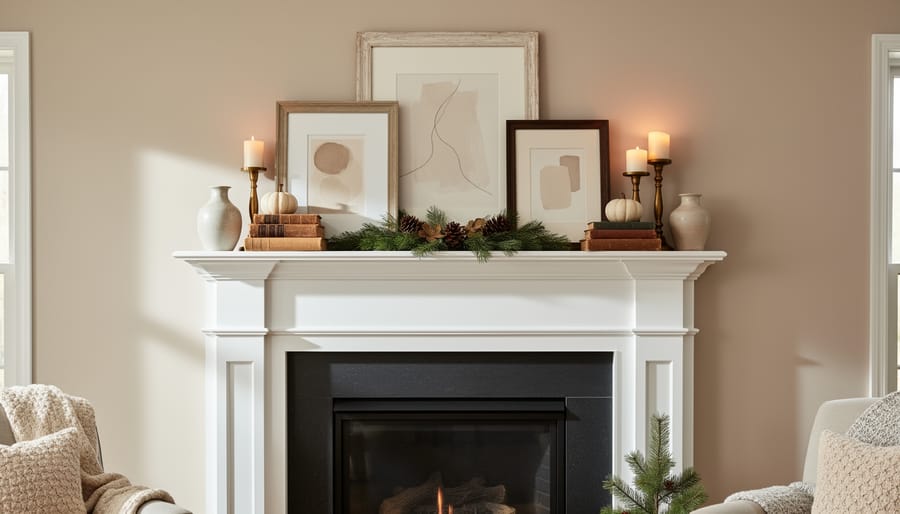
I’ve spent countless Saturday mornings prowling thrift stores and dollar shops, hunting for mantel treasures that won’t drain my wallet. The beauty of refreshing your mantel is that you don’t need to buy everything new. Some of my favorite seasonal displays have cost less than a latte run, and they’ve packed far more visual punch than any expensive centerpiece.
Start by gathering items from surprising places:
- Thrift stores for vintage candlesticks, frames, and unique finds
- Nature walks for branches, pinecones, acorns, and seasonal foliage
- Dollar stores for candles, small mirrors, and decorative fillers
- Your own closet for books, ceramics, and forgotten treasures
- Seasonal clearance sales for next year’s decor at 70% off
The secret to a polished mantel isn’t spending more. It’s layering different heights, textures, and finishes. I lean a large mirror or framed print against the wall as my anchor piece, then build around it with candlesticks of varying heights, small potted plants or greenery, and a stack of beautiful books. Mixing materials creates richness without cost: smooth glass vases next to rough bark branches, matte ceramic pots beside shiny brass candleholders.
Don’t overcrowd the space. Leave breathing room between groupings, and arrange items in odd numbers for a more natural feel. When seasons shift, swap out just two or three elements while keeping your favorites in place. That vintage brass candlestick? It works year-round when you change what surrounds it.
3. Install a Fresh Coat of Paint on the Mantel
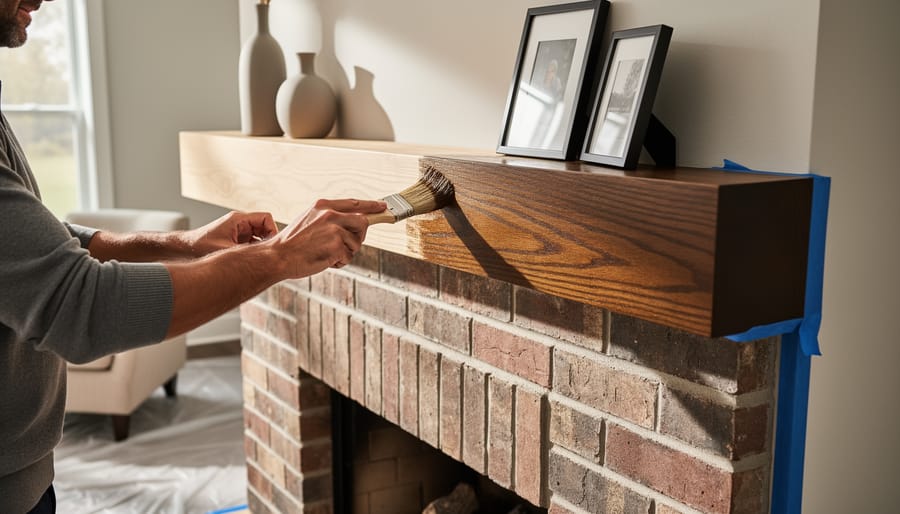
A wooden mantel is one of those features you probably walk past every day without really seeing it, until suddenly it looks tired or dated compared to the rest of your room. The good news? A fresh coat of paint or stain can completely transform it for less than twenty dollars and an afternoon of work.
Start by lightly sanding the surface with 120-grit sandpaper to rough up any existing finish and help the new paint adhere. Wipe away all dust with a damp cloth, then apply a coat of primer if you’re making a dramatic color change or covering dark wood. For paint, crisp white creates a clean, modern backdrop that makes seasonal decor pop. Bold charcoal or navy adds unexpected drama and pairs beautifully with warm metallics. If you prefer to keep the natural grain visible, a rich walnut or weathered gray stain brings warmth without heaviness.
Two thin coats always beat one thick layer. Let each coat dry completely, usually two to four hours. The beauty of this project is how it ties together your fireplace surround, mantel styling, and the room’s overall palette, much like how to style accents throughout a space for cohesion. You’ll be amazed at the difference a single paint color makes in elevating your entire fireplace wall.
4. Add or Update Fireplace Doors or a Screen
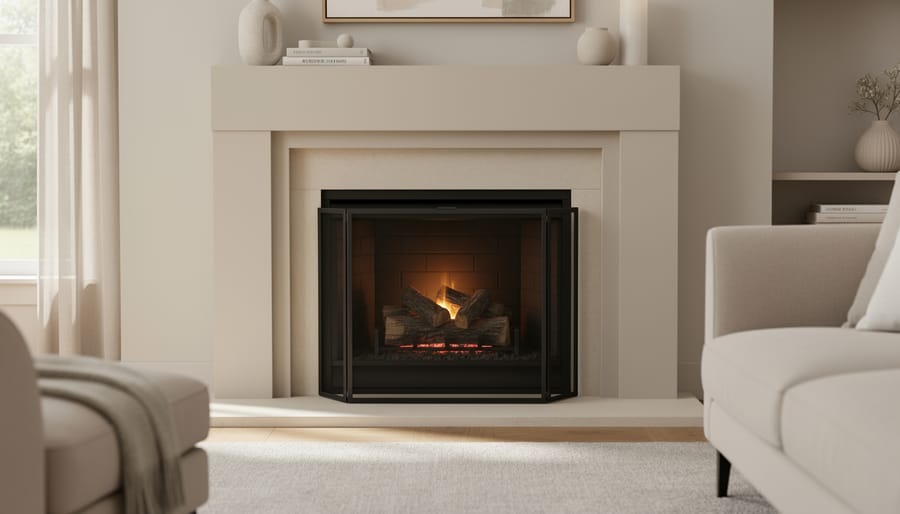
I picked up a vintage brass fireplace screen at a yard sale for twelve dollars, and it completely changed the feel of my living room. What had been a dark, dated opening suddenly looked intentional and polished. Fireplace doors and screens do double duty: they contain ash and embers while adding a layer of visual interest that frames the firebox beautifully.
Start by measuring your fireplace opening carefully, width and height, before you hunt. Check online marketplaces, architectural salvage shops, and estate sales for second-hand options. You’ll often find solid brass or wrought iron screens at a fraction of retail cost. Don’t worry if the finish looks tired. A good scrub with warm soapy water and a brass cleaner or steel wool can bring back surprising shine. For screens or doors that feel stuck in another decade, a coat of high-heat spray paint in matte black, oil-rubbed bronze, or even white transforms them instantly. Tape off any mesh panels, work in a well-ventilated area, and apply light, even coats.
If your fireplace is purely decorative, consider a folding screen in an unexpected finish or a simple mesh curtain panel hung from a tension rod just inside the opening. Even these small updates create definition and make the fireplace feel like a curated feature rather than a forgotten corner. The shift from bare opening to finished frame is one of those changes that guests notice immediately.
5. Create a Faux Firewood Display
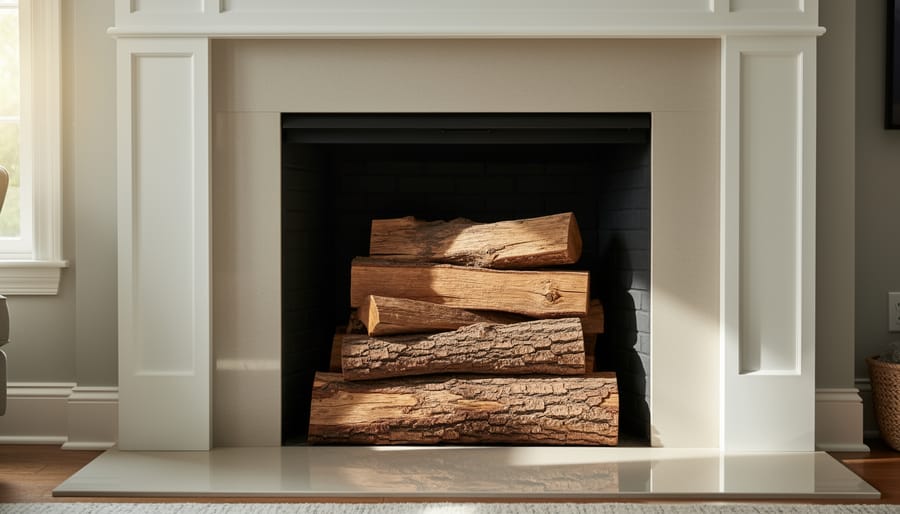
If your fireplace isn’t operational or you’re just not using it right now, the empty firebox can feel like a dark, forgotten void. I learned this trick one autumn when I couldn’t stand looking at that black hole anymore: fill it with a beautiful stack of firewood, and suddenly the whole space comes alive with texture and warmth.
Real birch logs are my favorite for this because their white bark adds instant charm, but you can use whatever’s available in your area or even create faux logs from painted branches or dowels. I’ve collected fallen branches from the yard, given them a quick clean, and arranged them in a casual stack that looks surprisingly intentional. If you want a more polished look, bundle a few logs with jute twine or add a wire basket to corral them.
This is one of those thrifty DIY storage ideas that works beautifully as decor. You can switch it up seasonally, too: add pinecones and evergreen sprigs in winter, or tuck in some white pumpkins for fall. The key is varying the log sizes and angling a few pieces for a natural, gathered-from-the-woodpile feel. It costs almost nothing if you forage your own wood, and it transforms that empty firebox into a cozy focal point.
6. Refresh the Hearth with a New Rug or Tile
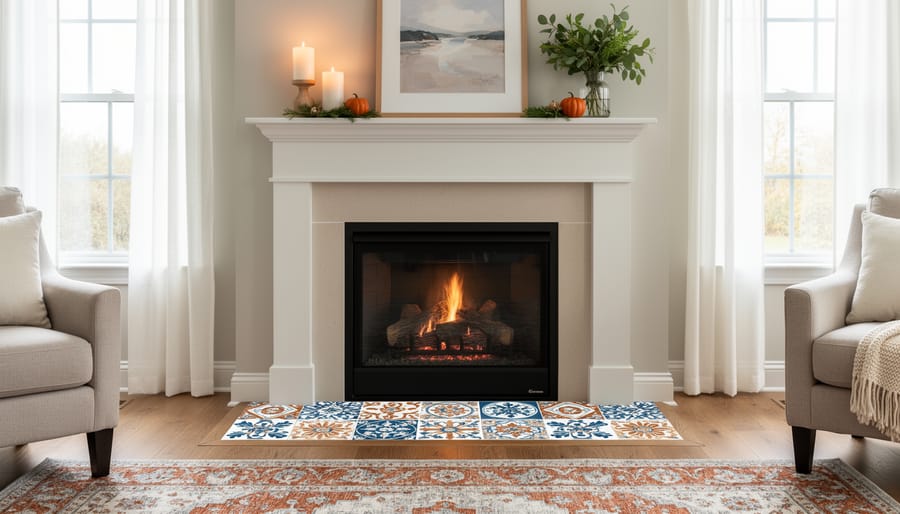
The hearth is one of those spaces that takes a beating, soot, ash, and foot traffic can leave it looking tired. A quick update here makes a bigger difference than you’d think, and you don’t need to rip out old tile or hire a contractor.
Peel-and-stick tile is my go-to for a budget hearth refresh. You can find convincing stone, marble, or geometric patterns for around $1 per square foot on clearance or at discount home stores. The key is choosing a heat-resistant product rated for fireplace use, check the packaging to be sure. I once transformed a dingy brick hearth with faux marble stick-on tiles in an afternoon, and it still looks great two years later. Clean the surface well, measure twice, and press firmly as you lay each tile.
If you prefer the softer look of a rug, place a small fire-resistant mat or natural fiber rug just in front of the hearth, not directly on it. Jute, wool, or treated cotton work well and add warmth underfoot. Keep it a safe distance from any flames and shake it out regularly.
For real tile on a budget, ask at home improvement stores about remnants or discontinued styles. I’ve scored beautiful ceramic and slate pieces for less than $20 that covered a small hearth perfectly. A simple thin-set mortar application is DIY-friendly if you’re feeling adventurous. Either route, rug or tile, instantly pulls the whole fireplace area together.
7. Install Simple Floating Shelves Beside the Fireplace
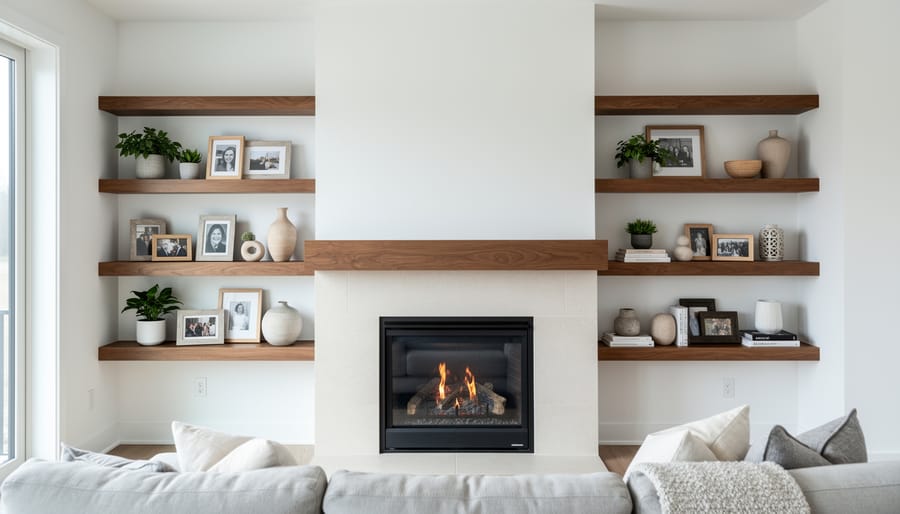
Floating shelves flanking a fireplace instantly create that custom, built-in vibe you see in designer magazines, and you can pull it off for under $40. I installed a pair of simple pine shelves on either side of my living room fireplace last fall, and guests genuinely thought they’d always been there.
You’ll find affordable floating shelf kits at any home improvement store or online. Measure carefully so the shelves sit at a balanced height relative to your mantel, usually somewhere between mantel height and ceiling works best. Most kits come with hidden brackets and clear instructions. If your walls are brick or stone, you’ll need masonry anchors, which add a few dollars but make the installation rock-solid.
Once they’re up, the styling part is pure fun. I like to mix heights and textures: a small stack of vintage books, a trailing pothos plant, a few framed family photos, and a pretty candle or two. Rotate items seasonally to keep things fresh. In autumn, I swap in mini pumpkins and dried wheat. Winter calls for evergreen sprigs and mercury glass.
The beauty here is flexibility. These shelves give you room to display treasures without cluttering the mantel, and they frame the fireplace in a way that feels intentional and polished, not DIY-budget.
8. Hang a Large Mirror or Artwork Above the Mantel
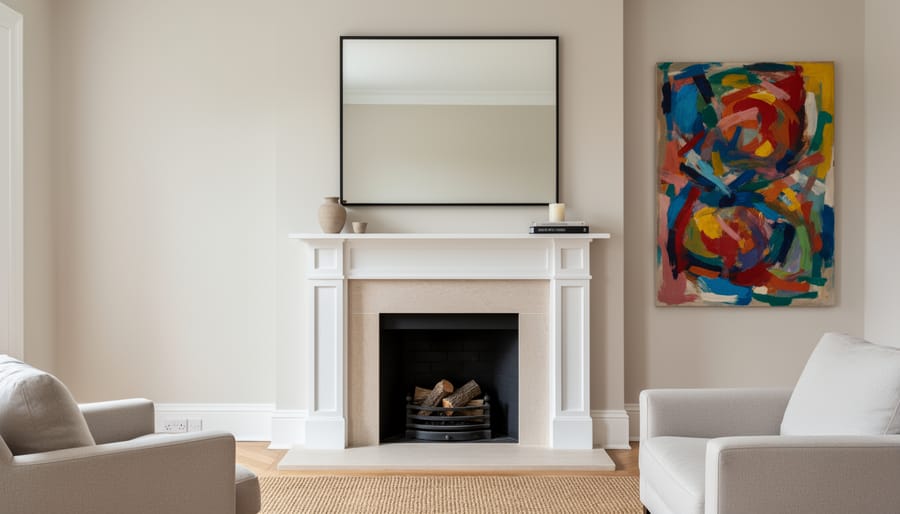
A single large mirror or piece of artwork above your mantel can completely redefine the entire fireplace wall, and you don’t need to spend a fortune to achieve that gallery-worthy look. I hung an oversized vintage mirror I found at an estate sale for $35, and it instantly made the room feel taller, brighter, and more intentional.
The key is scale. Your mirror or art should be at least two-thirds the width of your mantel to create visual balance. Too small, and it looks like an afterthought. A substantial piece commands attention and ties the whole fireplace area together. Estate sales, online marketplaces, and even your local thrift store are treasure troves for affordable mirrors with character. Look for ornate frames you can spray paint to match your decor, or simple frames you can upgrade with molding.
If you’re choosing artwork, consider DIY options like large canvas prints from inexpensive photo printing services, botanical prints from free online sources framed in budget frames, or even fabric stretched over canvas frames. A bold abstract piece or a black-and-white photograph makes a sophisticated statement without requiring a big investment.
One large piece creates drama and simplicity, while a gallery wall offers more personality and flexibility to showcase smaller finds over time. Either approach works beautifully, but if you’re budget-conscious, start with one impactful mirror or artwork and let it shine. You can always layer in smaller pieces later as your collection grows.
Bringing It All Together
Refreshing your fireplace doesn’t have to mean a complete overhaul or a hefty price tag. As we’ve explored, a little paint, some creative styling, and a few well-chosen accents can completely transform this beloved gathering spot without breaking the bank. Whether you tackle all eight ideas at once or spread them out over several weekends, each small change builds toward a fireplace that feels both fresh and deeply personal.
I’ve found that the best transformations happen in layers. Maybe you begin with a coat of paint on the brick this month, then swap out the mantel decor when autumn arrives. The beauty of these thrifty projects is their flexibility. They grow with your budget, your energy, and your evolving vision for the space. Your fireplace can be a cherished focal point in every season, reflecting the warmth and creativity you bring to your home. I’d love to hear which project you try first and how it transforms your space.
Frequently Asked Questions
Can I paint brick without ruining it?
Yes, you absolutely can. The key is proper prep: clean the brick thoroughly, let it dry completely, and use a high-quality primer designed for masonry. Once painted, brick is nearly impossible to return to its original state, so commit to the color you choose.
What’s the best paint for a mantel?
For wooden mantels, I recommend either a semi-gloss latex paint for durability or a penetrating wood stain if you want to preserve the grain. Semi-gloss holds up well to handling and dusting, and it’s easy to touch up when needed.
How do I style a mantel for different seasons?
Start with a few anchor pieces that stay year-round, like a mirror or large frame, then swap out smaller accents. In fall, bring in pumpkins and warm-toned foliage; winter calls for evergreen branches and candles; spring and summer shine with fresh flowers and lighter colors.
Are peel-and-stick tiles heat-safe?
Most peel-and-stick tiles are not rated for direct heat exposure, so keep them on the hearth surface rather than inside the firebox or directly against a hot fireplace opening. They work beautifully on non-functioning fireplaces or cool hearth surfaces in front of the fireplace.
Where can I find affordable fireplace decor on a budget?
Thrift stores, estate sales, and online marketplaces are goldmines for mantels, mirrors, vintage screens, and unique decor pieces. Don’t overlook your own home either, repurposing items from other rooms or rearranging what you already own costs nothing and often yields the freshest results.
These questions come up time and again from readers tackling their first fireplace makeover, and I love that each answer opens the door to creativity rather than closing it with rules. The beauty of these thrifty projects is that you can experiment, adjust, and make them your own without worrying about a huge investment. Trust your instincts, start small, and enjoy the process of transforming your fireplace into a space that truly feels like home.