The smartest kitchen storage improvements to tackle first are the ones that solve your biggest pain points without requiring a full renovation: pull-out shelves in lower cabinets, drawer dividers, and lazy Susans for corner cabinets. These three upgrades transform the spaces you use most often, eliminate daily frustration, and cost less than $200 combined for an average kitchen.
I learned this the hard way after spending a small fortune on beautiful glass canisters that looked gorgeous on my counter but did nothing to solve the real problem: I couldn’t reach the pots shoved to the back of my lower cabinets, and I’d given up on my corner cabinet entirely. Once I installed a simple pull-out shelf and a lazy Susan, my morning routine became 10 minutes faster because I stopped playing cabinet Tetris before my first cup of coffee.
The seven improvements in this guide prioritize accessibility and daily function over aesthetics alone. You’ll find practical solutions for the dead zones in your kitchen: those deep lower cabinets, chaotic utensil drawers, and that black hole under the sink where cleaning supplies go to disappear. Most require nothing more than a measuring tape, a drill, and an afternoon. Start with the storage fixes that address your most-used spaces, and you’ll feel the difference every single day without breaking your budget or calling a contractor.
How I Chose These Storage Improvements
When I set out to narrow down which storage improvements truly deserve your attention first, I didn’t want to give you another overwhelming list of everything you could do. Instead, I focused on changes that tackle the daily annoyances we all face, those moments when you’re digging through a cabinet for the right pot lid or pushing aside five things just to grab one spice jar.
My selection criteria came down to three non-negotiables. First, does it offer immediate daily relief? If a change makes your morning coffee routine or dinner prep smoother within the first week, it’s worth doing. Second, will it work within a modest budget? I prioritized improvements under $100 that deliver visible impact without requiring you to plan your project like a full renovation. Third, can you DIY it? While companies like Canadian Custom Cabinets create beautiful solutions, these improvements shouldn’t require professional installation.
As fall settles in and we spend more time cooking and baking indoors, a functional kitchen becomes even more essential. The improvements ahead aren’t about perfection, they’re about reclaiming space and sanity, one smart fix at a time.
1. Pull-Out Shelves in Lower Cabinets
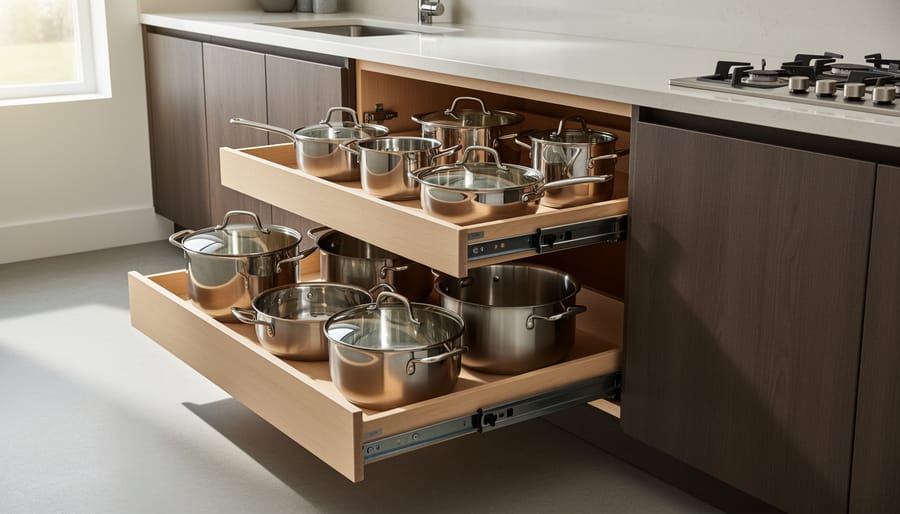
You know that moment when you’re crouching on the kitchen floor, arm stretched deep into a lower cabinet, groping blindly for that Dutch oven you swear is somewhere in the back? I’ve been there too many times. Those deep lower cabinets become black holes where pots, pans, and lids disappear into a frustrating jumble.
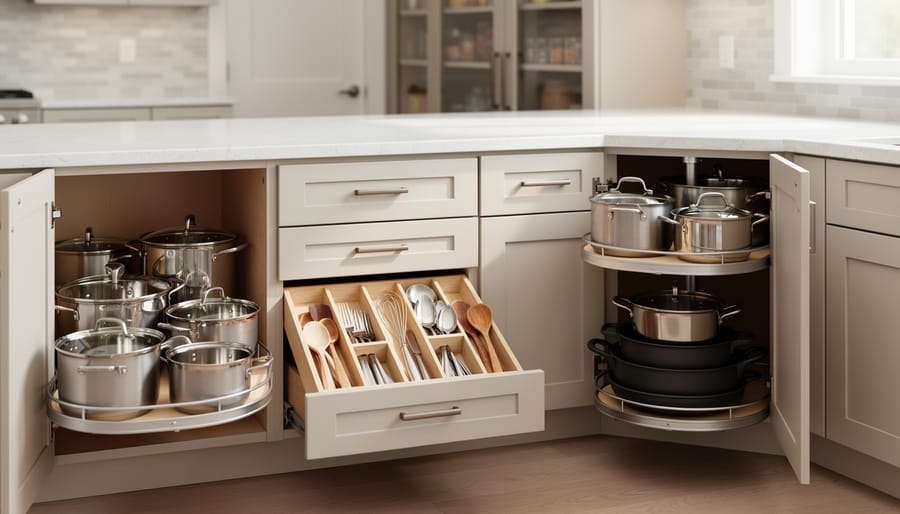
Pull-out shelves completely solve this problem, and they’re genuinely worth making your first storage improvement. These sliding shelves transform the entire depth of your cabinet into accessible space. Instead of kneeling and reaching, you simply pull the shelf toward you and see everything at once. No more stacking heavy pans five deep or banging lids around trying to extract one item.
The impact hits you immediately. That first morning when you slide out a shelf and grab exactly what you need in three seconds instead of three minutes? It changes your whole cooking routine. I installed pull-out shelves in my two deepest lower cabinets last spring, and I honestly use those cabinets more than any others now.
Budget-wise, expect to spend $30 to $80 per shelf for quality sliding hardware and mounting materials. You can find affordable kits at home improvement stores that include everything you need. For DIY installation, you’ll use basic tools: a drill, screwdriver, level, and measuring tape. Most shelves mount to the cabinet sides with just four to six screws.
Measure your cabinet interior carefully before buying. You need accurate width, depth, and height to ensure proper fit around any plumbing or obstructions. Start with your most-used lower cabinet first. Once you experience the difference, you’ll want to tackle the rest.
2. Drawer Dividers and Organizers
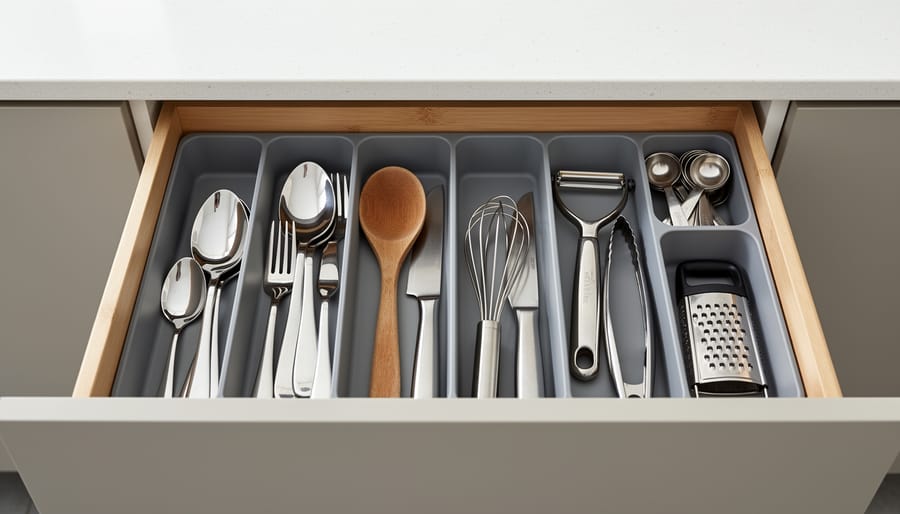
If you’ve ever rifled through a jumbled utensil drawer searching for that one measuring spoon, you know the daily frustration of disorganized drawers. Drawer dividers are hands-down the easiest, fastest storage improvement you can make, and the relief you’ll feel is immediate.
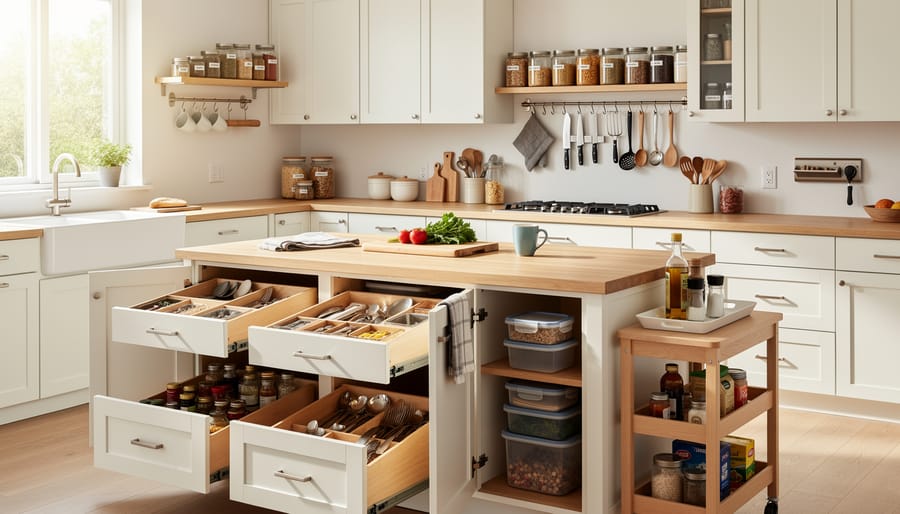
I started with my utensil drawer because it drove me crazy every single morning. A simple bamboo organizer from the home store transformed it in under ten minutes. Suddenly, whisks stayed with whisks, measuring spoons lived in their own compartment, and I could actually see what I owned. The same principle works magic in spice drawers and that infamous junk drawer where batteries, twist ties, and takeout menus breed chaos.
The beauty of dividers is that you don’t need to buy expensive matching sets. Bamboo organizers are affordable and adjustable, fitting most standard drawer sizes. If you’re working with odd dimensions, shallow cardboard boxes from packaging make surprisingly effective DIY dividers. Cut them to fit, cover with contact paper or fabric scraps if you want them prettier, and drop them in. For deeper drawers, foam board from a craft store can be cut and slotted together to create custom compartments that hold everything from spice jars to kitchen gadgets perfectly upright.
Even small, inexpensive silicone dividers can corral rubber bands, bag clips, and other tiny items that usually scatter. The goal isn’t perfection. It’s giving every category of stuff its own home so you stop digging and start finding. When you can open a drawer and grab what you need in two seconds instead of twenty, that small change delivers big daily relief.
3. Lazy Susans for Corner Cabinets
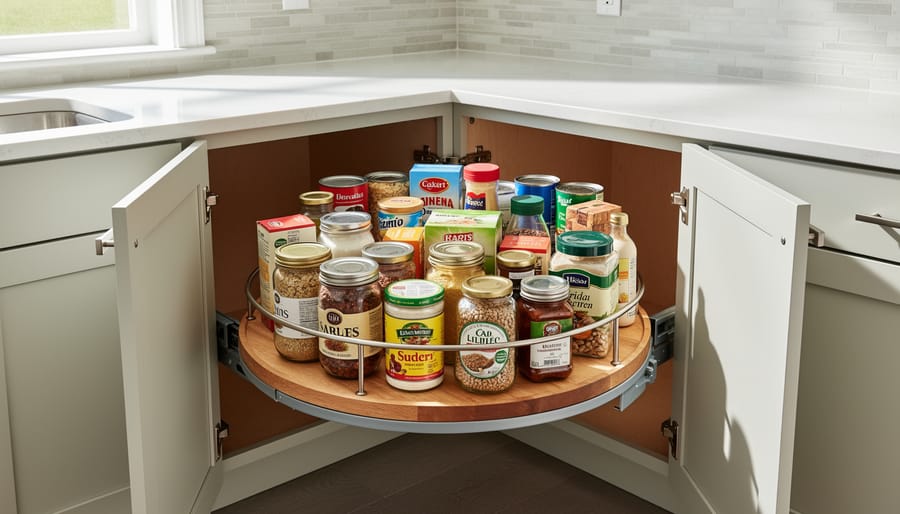
Corner cabinets are where good intentions go to die. You buy that lovely serving platter or stock up on canned goods, tuck them into the back corner, and never see them again until you move. I once discovered three cans of chickpeas that expired in 2019 wedged behind a slow cooker I’d forgotten I owned.
A lazy Susan changes this completely. Instead of crouching down and stretching your arm into a dark void, you simply spin the tray to bring everything within reach. The difference feels miraculous the first time you use it.
For standard corner cabinets, measure the opening width before you shop. Most lazy Susans come in 12, 16, or 18-inch diameters. You want one that rotates freely without scraping the cabinet walls, so leave at least an inch of clearance on each side. The two-tiered models work beautifully for maximizing vertical space with spices, oils, or baking supplies.
Installation couldn’t be simpler. Most models just sit in place with no mounting required, though you can secure them with a center post if you prefer. I’ve added lazy Susans to my regular pantry shelves too, not just corners. They’re perfect for corralling vitamins and supplements, keeping tea bags organized, or creating a rotating coffee station with mugs, filters, and sweeteners all in one spot.
The key is thinking beyond the obvious. Any cabinet where items migrate to the back becomes instantly more functional with a rotating tray. For about fifteen dollars and two minutes of effort, you’ll wonder how you lived without them.
4. Vertical Tray and Cutting Board Storage
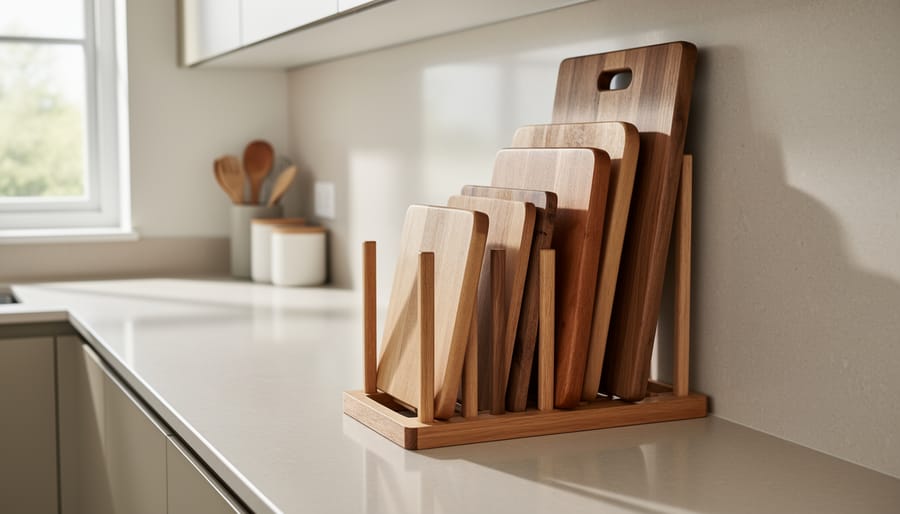
I’ll never forget the mini avalanche that happened every time I opened my cabinet to grab a baking sheet. The crash of metal hitting metal, the cutting boards sliding forward, the cookie sheets clattering to the floor. If you’re stacking your flat items horizontally, you already know this struggle. The piece you need is always on the bottom, and retrieving it means dismantling the entire tower.
Storing trays, cutting boards, baking sheets, and cookie pans vertically changed everything in my kitchen. Instead of a precarious stack, each item slides out independently like a file in a filing cabinet. You can see what you have at a glance, grab exactly what you need without disturbing anything else, and actually use that fancy walnut cutting board you received as a wedding gift.
The transformation doesn’t require fancy equipment. Tension rods installed front-to-back in a cabinet create instant dividers for about three dollars each. I started with two rods in a 24-inch cabinet, which gave me three sections. Position them about four inches apart, depending on what you’re storing.
For drawers, expandable drawer dividers work beautifully and adjust to fit different spaces. I’ve also seen gorgeous DIY solutions using thin plywood strips secured with small L-brackets to create custom slots. One reader shared that she repurposed a bamboo file organizer from the office supply store, turned it on its side, and it fit perfectly in her cabinet.
Metal wire file organizers from office supply stores work surprisingly well too. The open construction lets you see everything, and they’re designed to be stable under weight. I picked up two for under fifteen dollars and installed them in minutes without any tools.
5. Under-Sink Organization Systems
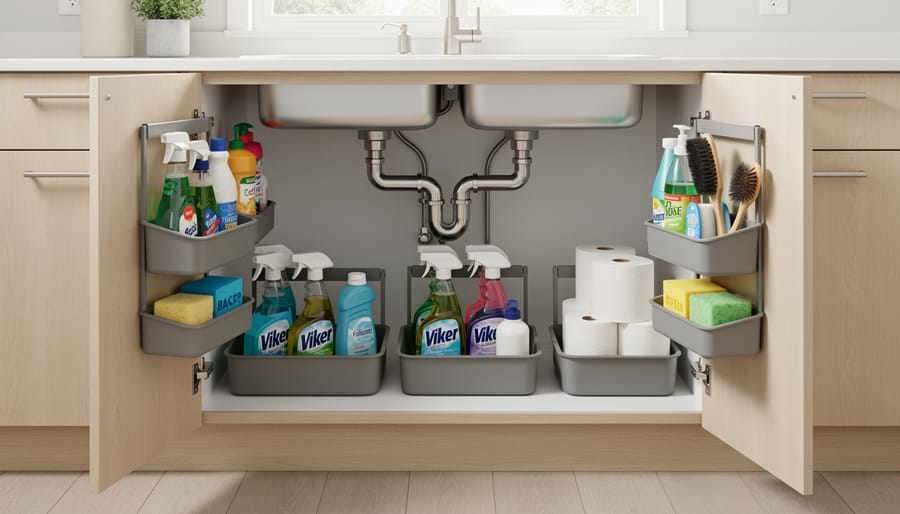
The space under your kitchen sink probably looks like mine did for years, a chaotic jumble of cleaning supplies, half-empty bottles, and mysterious items shoved to the back. Everything topples over when you reach for the dish soap, and you can’t remember what you actually have down there. It’s the cabinet we all avoid organizing because those pipes seem to make it impossible.
Here’s the good news: you don’t need custom carpentry to tame this space. Simple, affordable systems work around the plumbing and transform chaos into order.
Start with a two-tier expandable shelf that straddles the pipes. These U-shaped shelves cost $15 to $30 and instantly double your vertical space. Place frequently used items like dish soap and sponges on the upper tier where they’re easy to grab, and reserve the lower level for backup supplies or less-used cleaners.
For narrow cabinets, a slim pull-out caddy on wheels slides past the plumbing and brings everything forward. No more lying on the floor with a flashlight to find the furniture polish. These caddies typically run $25 to $40 and require zero installation.
One of my favorite tricks costs almost nothing: hang a tension rod across the cabinet width to hold spray bottles by their triggers. This frees up valuable floor space and keeps bottles upright so they don’t leak. Add adhesive hooks to the cabinet door for gloves, scrub brushes, or small dustpans.
Small stackable bins corral similar items, one for sponges and cloths, another for garbage bags, a third for specialty cleaners. Clear bins let you see what you have at a glance, preventing duplicate purchases.
The beauty of these solutions? They’re all removable. Perfect if you rent or simply want flexibility to adjust your system as needs change.
6. Door-Mounted Storage Racks
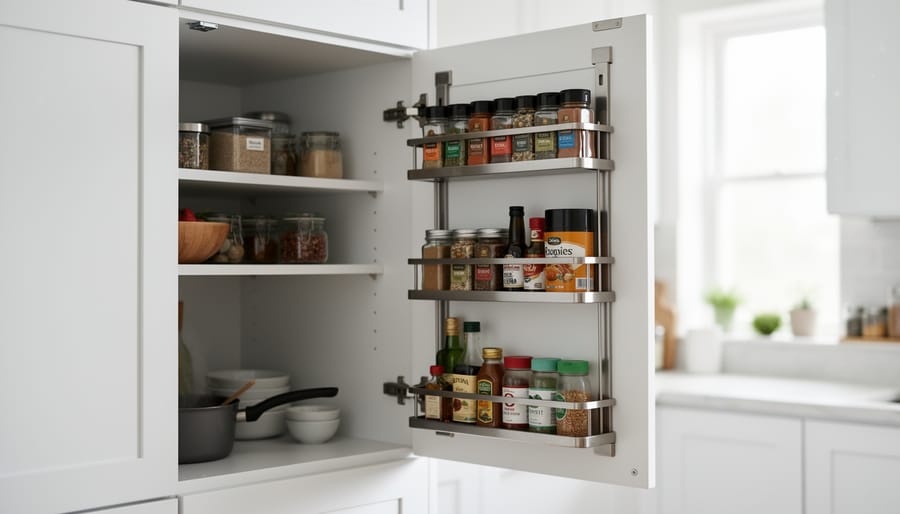
I’ll never forget the moment I opened my spice cabinet and realized I’d been ignoring twelve square feet of perfectly good storage space. The backs of those cabinet doors had been staring at me for years, completely empty while I played Tetris with overflowing shelves.
Door-mounted storage racks might be the easiest win on this entire list. They require minimal tools, take about fifteen minutes to install, and instantly free up shelf space that you can reclaim for other items. The beauty is that you’re not sacrificing anything, you’re just making dead space work for you.
Inside cabinet doors work wonderfully for spice racks that keep bottles visible and accessible. No more digging through a chaotic pile to find the cumin. I mounted a three-tier rack on my upper cabinet door last fall, and it holds about thirty spice jars perfectly. The adhesive-backed versions work fine for lighter items, though I prefer small screws for anything holding glass bottles.
Pot lid storage is another brilliant use. Those awkward lids that never stack neatly? Mount a simple wire rack on a lower cabinet door and slide them right in. Measuring cups and spoons work the same way with small adhesive hooks, they’re right where you need them when you’re baking.
Under the sink, door-mounted caddies hold cleaning supplies beautifully. I use a wire basket that hooks over the cabinet door edge, no installation required. It keeps spray bottles upright and prevents the avalanche that used to happen every time I reached for dish soap.
The best part? These solutions are renter-friendly and completely reversible if you change your mind.
7. Clear, Stackable Pantry Containers
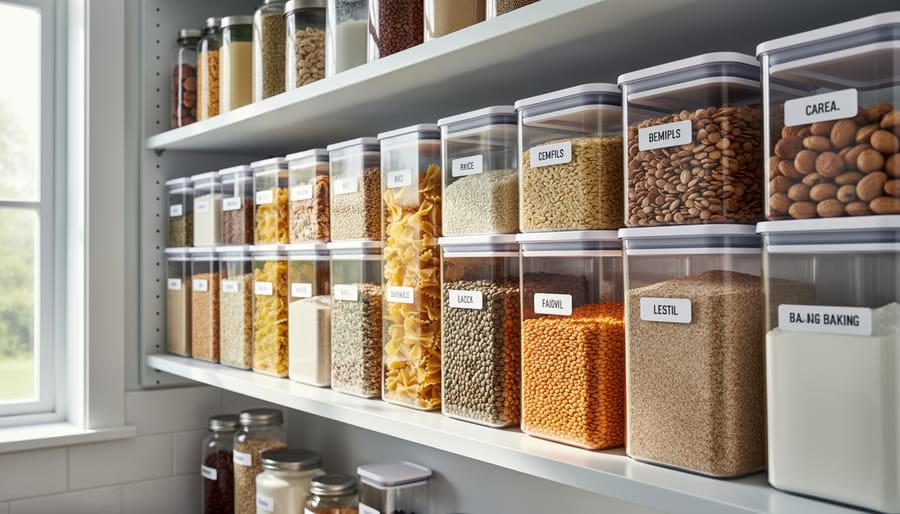
I remember opening my pantry one morning to find cereal spilling from a torn bag, sugar clumped from moisture, and three half-empty bags of the same pasta I’d just bought because I couldn’t see what I already had. That frustrating moment pushed me toward what might be the most visually satisfying storage upgrade you can make: transferring dry goods into clear, stackable containers.
The transformation goes beyond looks, though the uniform rows of labeled containers do create that instantly calming, Pinterest-worthy effect. When flour, sugar, rice, and pasta live in see-through containers, you actually know what you have. No more duplicate purchases or discovering expired food hidden behind newer items. I can glance at my pantry and immediately spot that we’re running low on oatmeal or that the brown sugar container needs refilling.
The waste prevention alone makes this worthwhile. Airtight containers keep crackers crisp, cereal fresh, and prevent those little pantry moths that love getting into paper packaging. I’ve stopped throwing away half-used bags of ingredients that went stale because they weren’t properly sealed.
Budget-wise, you don’t need to outfit your entire pantry at once. Start with your most-used staples: flour, sugar, rice, pasta, coffee. Many stores buy organization supplies offer affordable sets that include various sizes. I’ve found mixing budget container sets with a few nicer canisters for countertop display works perfectly.
This improvement answers several kitchen remodel questions about maximizing existing pantry space without construction. Square containers waste less space than round ones, and stackability means you’re using vertical space efficiently. Label everything clearly, and suddenly your pantry becomes a place that actually helps you cook rather than frustrates you.
Key Details to Know
Before you dive into your first storage project, keep these practical details in mind to ensure success and avoid common pitfalls:
- Measure twice, buy once, cabinet depths, door clearances, and under-sink pipe configurations vary widely, so accurate measurements prevent returns and frustration
- Start with the storage improvement that addresses your biggest daily annoyance rather than the most impressive transformation
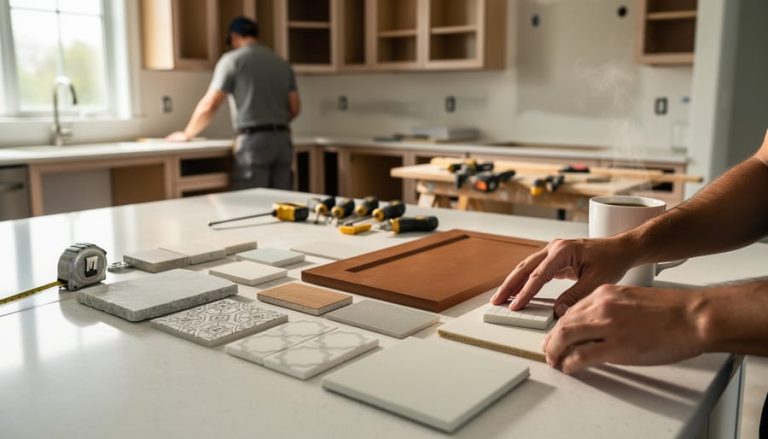
- Most DIY solutions require only basic tools like a drill, level, and measuring tape, making them accessible weekend projects
- Adhesive-mounted options work beautifully for renters or those avoiding permanent changes, but test weight limits before loading them up
- Budget-friendly doesn’t mean low-quality, many effective organizers cost $15, $40 and deliver years of reliable use
- Clear containers and open dividers let you see what you have at a glance, reducing food waste and duplicate purchases
These improvements work together beautifully, so you can tackle them one at a time as your budget allows. Many readers find that completing just two or three of these projects dramatically transforms their kitchen’s functionality. If you’re looking for more ways to refresh your space affordably, explore these ideas to welcome fall on a budget while enhancing your home’s organization and charm.
What to Watch For
Before you start installing any of these storage solutions, take time to measure your actual cabinet dimensions carefully. I learned this the hard way when I bought beautiful pull-out shelves that were just half an inch too wide for my cabinet opening. Bring a tape measure and note the height, width, and depth of each space, including any obstructions like hinges or plumbing pipes under the sink.
Also watch the weight capacity on organizers, especially for pull-out shelves and lazy Susans. If you’re storing heavy cast iron pans or stacks of dinner plates, cheap plastic solutions will sag or crack within months. Look for metal glides rated for at least 75 pounds on pull-outs, and solid wood or thick plastic for rotating trays. Door-mounted racks deserve extra attention too, adhesive versions work beautifully for lightweight spices but will fail under the weight of canned goods. When in doubt, opt for screw-mounted hardware on cabinet doors. These small details make the difference between storage that lasts years and solutions that frustrate you all over again.
Common Questions About Kitchen Storage Priorities
Which storage improvement should I start with if I can only tackle one?
Start with whichever solution addresses your biggest daily frustration. If you’re constantly digging through lower cabinets, begin with pull-out shelves. If you can’t find anything in your drawers, dividers should be first.
Should I DIY these improvements or buy ready-made solutions?
Ready-made options like lazy Susans, door racks, and drawer dividers work beautifully and install in minutes. Save DIY efforts for custom solutions like vertical tray dividers or pull-out shelves where your cabinet dimensions don’t match standard sizes.
How do I measure my cabinet space accurately?
Measure width, depth, and height in three spots for each dimension since cabinets aren’t always perfectly square. Note any obstructions like hinges, plumbing, or center supports, and always subtract an inch from your measurements when ordering to ensure a comfortable fit.
What if my cabinets have an unusual layout that doesn’t fit standard organizers?
Focus on flexible solutions like adjustable drawer dividers, modular pantry containers, or adhesive door racks that adapt to different spaces. For truly odd configurations, simple DIY approaches using tension rods or repurposed boxes often work better than forcing standard products to fit.
I’ve found that most folks worry they need to overhaul everything at once, but that’s just not true. These improvements work independently, so you can space them out over weeks or months as your budget allows. Start where the chaos bothers you most, and you’ll feel the relief immediately.
The transformation doesn’t require tackling all seven improvements at once. Choose the one that solves your biggest daily headache, maybe it’s the drawer you can’t close, the cabinet that swallows mixing bowls, or the pantry where you buy duplicates because you can’t see what you have. Start there. Install those pull-out shelves or dividers this weekend, and you’ll feel the relief Monday morning when you’re reaching for your coffee mug.
I’ve learned that kitchen storage isn’t about perfection. It’s about making your space work better for how you actually cook and live. One thoughtful improvement creates a ripple effect, suddenly you’re reaching for the right pan without frustration, and that small victory changes how you feel about your kitchen.
As we move deeper into fall and holiday cooking season approaches, there’s no better time to give yourself this gift. Whether you’re prepping Thanksgiving sides or simply making Tuesday’s dinner, an organized kitchen makes everything more enjoyable. You deserve a space that supports you, not one that adds stress to your day.
Start small, start now, and watch how one simple change transforms your kitchen into the functional, welcoming heart of your home.